In this section you can find: (to jump to a section click any of the bullet points)
Price / Multi Price Enquiry
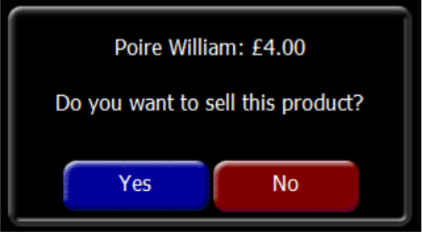
The enquiry option allows the look up of a single or multiple product price without selling the product on the PoS, by pressing either of the buttons and then selecting a product the price window will appear. The price will be displayed along with the option to sell this item.
If using the Multi Price enquiry function this should be turned off after price checks by pressing the button again.
Product Search
Searching for a product can be performed by this function any number of characters can be used including mid word search. Words that begin with the letters searched for appear in blue and words that contain those letters appear in red.

Print Last Payment
The Print Last Payment function will allow a receipt to be generated for last payment for the employee logged onto the terminal. If this is the first time that the receipt had been generated this will print as normal but if previously there had been a receipt generated, then this function will print out a duplicate receipt.
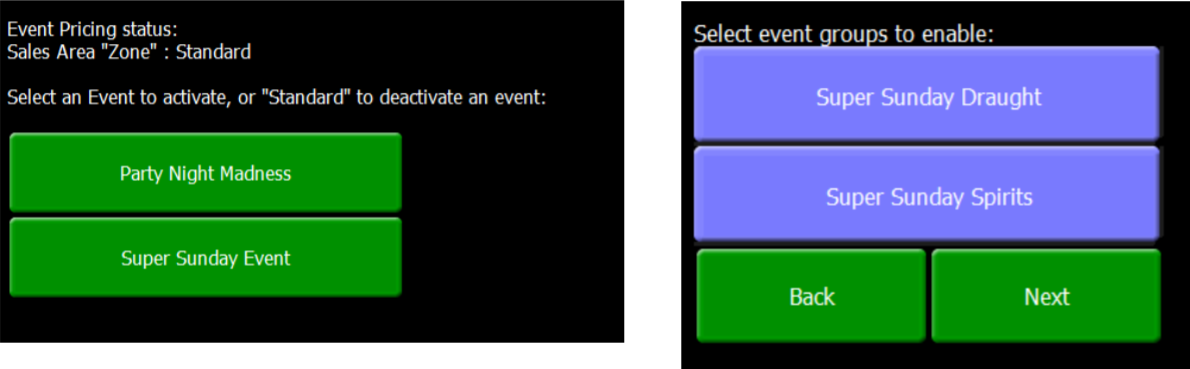
Event Pricing
Event pricing is a type of promotion that can be switched on and off on the PoS and will allow a range of products to have a new price against them. In addition, an event can be configured to have other promotions to be switched on and normal promotions to be switched off. The function on the PoS allows the event just to be switched on or off, the configuration is performed in Aztec Back of House software.
-
Press the Event Pricing button, displayed on screen will be a list of all the available events, select the event by pressing the Event Name button.
-
The second screen displayed is the Select Groups, by default any groups are automatically “toggled on” if all are required press the Next button or de-select the group not required.
-
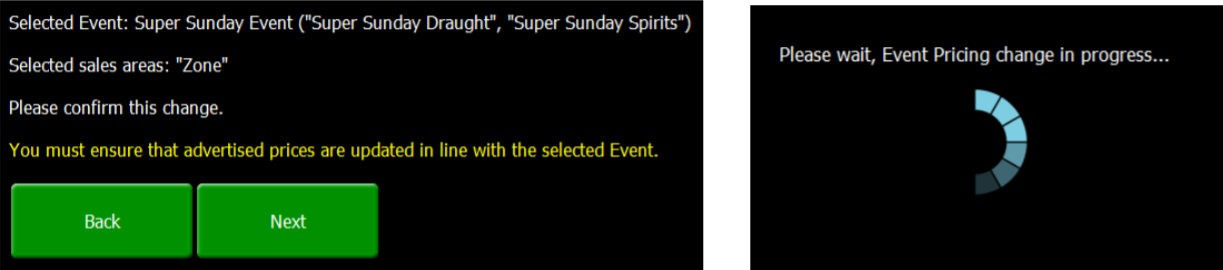
Press the Next button to confirm the required price changes, the PoS will update. Press the OK button when returned to the main event pricing screen.
-
To return to normal pricing press the Event Pricing button and select the Standard button and continue through the prompts to update back to normal tariff pricing.
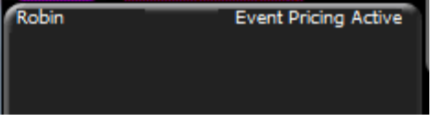
During event pricing mode the top of the order display will flash between the current date and time and the words “Event Pricing Active”.
Increase Float - Drawer
When using float management with Aztec Finance the increase drawer float button is used to add further change amounts into the cash drawer.
-
Press Increase Drawer Float and enter a reference if requested then press the OK button.
-
Enter the increase in float value and press the Enter button.
-
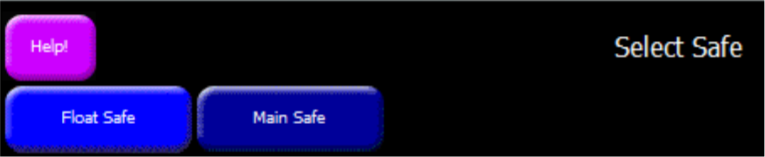
Select the source safe, the default back of house safe is displayed in lighter blue.
Select the safe by pressing the Safe Name button and confirm Yes for the float increase. (Only if more than 1 site is in use).
Increase Float – Money Belt
When using money belt float management with Aztec Finance the increase money belt float button is used to add further change amounts into the server’s money belt.
-
Press Increase Money Belt Float and enter a reference if requested then press the OK button.
-
Enter the increase in float value and press the Enter button.
-
Select the source safe, the default back of house safe is displayed in lighter blue.
Select the safe by pressing the Safe Name button and confirm Yes for the float increase. (Only if more than 1 site is in use).
Uplift - Drawer
Uplift allows the removal of cash from the drawer by an amount of to count in the office later.
-
Press the Uplift Drawer button and if prompted enter a reference if required then press the OK button.
-
Enter the value to be uplifted or press the Count In Office button, if using the count in office function confirm Yes to perform this action. If entering a value press the Enter button, if there are multiple safes setup select the required safe for them money to be deposited to. The default back of house safe will be in light blue, confirm by pressing the Yes button.
Uplift – Money Belt
Uplift allows the removal of cash from the server money belt by an amount of to count in the office later.
-
Press the Uplift Money Belt button and if prompted enter a reference if required then press the OK button.
-
Enter the value to be uplifted or press the Count In Office button, if using the count in office function confirm Yes to perform this action. If entering a value press the Enter button, if there are multiple safes setup select the required safe for them money to be deposited to. The default back of house safe will be in light blue, confirm by pressing the Yes button.
Spot Check
The Spot Check function allows a stock line check to be completed on the PoS.
-
Press the Spot Check button and confirm Yes to start a spot check session.
-
Select the first product to perform a spot check on and the count screen will be displayed.
-
If configured the current stock level will be displayed, enter the count value, and press the Enter button.
-
Continue with the spot check process, when finished press the Spot Check button, press the Yes button to confirm the end of the session. The spot check report will be produced displaying the expected, actual and variance figures for each product. Press the Print Report button and press the OK button to complete.
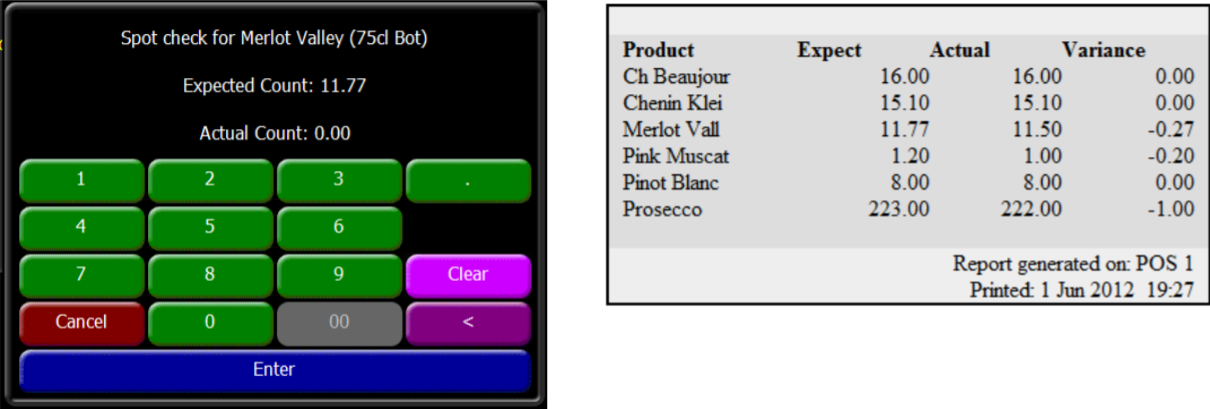
When running a spot check the words “Spot Check Mode” appear in yellow across the order display, during this time normal sales activity is not possible.
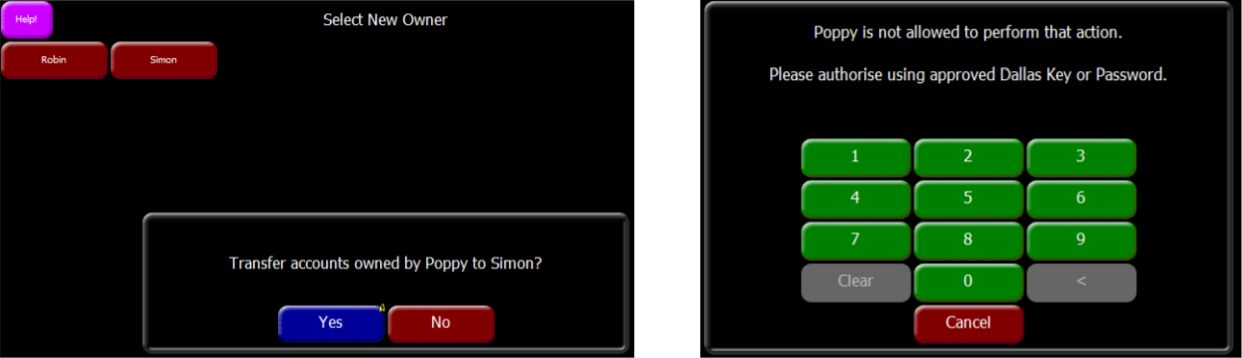
Transfer Ownership
Transfer ownership allows the table or bar account to be transferred to another server before they end their working shift. There are two functions for transfer ownership either by single table / account or by bulk transfer.
-
Press the Bulk Transfer Ownership button and choose the Employee button who is going to be taking over the accounts / tables, press the Yes button to continue. If configured the employee who is receiving the accounts should authorise the transfer.
-
The Select Account to Transfer screen will be displayed showing all the current accounts / tables owned by the server. Press each of the Account or Table buttons to transfer when complete press the Close button.

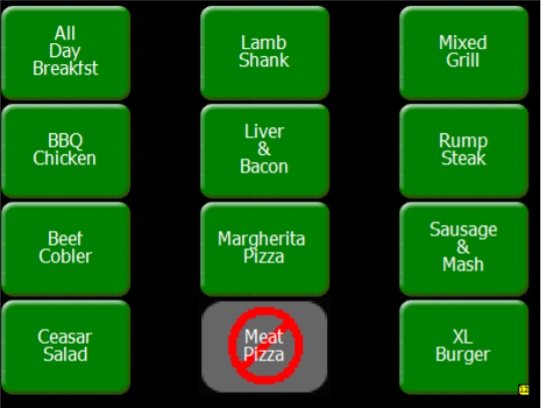
Stock Mode
Stock mode allows you to set a limit on products or to set a product to un-available. This has no direct relation to the back of house stock module.
-
Press the Stock Mode button and then select the require product.
-
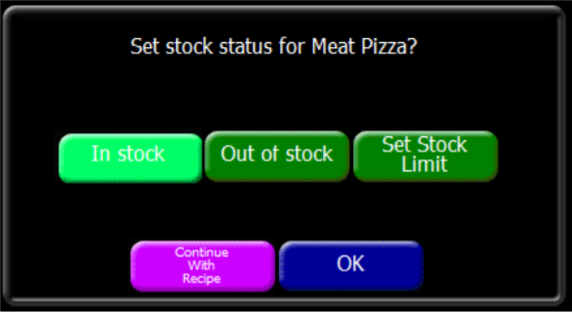
The stock status window will appear allow the following options.
-
In Stock – by default this is switched on but would allow an out-of-stock item to be set back in stock.
-
Out of Stock – press this to set a product to be out of stock completely.
-
Set Stock Limit – press this to set a value of products available against the product.
-
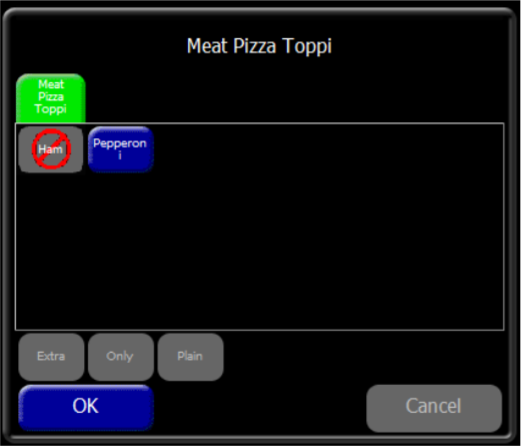
Continue with Recipe – allows an item contained in a choice to have a limit or be set out of stock.
-
-
Select the required option and press the OK button, when selecting the stock limit function, you can enter the count available and press the OK button.